The error code “F2†will be displayed along with a beeping sound if the ERC (Electronic Range Control) or “clock†senses a runaway heat condition during the “cook†or the “clean†modes. It could be caused by the oven temperature sensor, by the ERC or by the wire harness between the oven temperature sensor and the ERC. If the error code “F2†is displayed in the “cook†or “clean†modes only, then the problem is a bad oven temperature sensor or its wire harness. If the error code “F2†is displayed in the time of the day mode also, then most likely a problem is the bad ERC. The access to the oven temperature sensor plug and the wires is from the back only. You have to pull the oven out of the wall (if it’s free standing) or remove it from the cabinet (if it’s built in). Disconnect the power and remove the rear cover. Check the resistance across the oven temperature sensor. It is supposed to be about 1100 Ohms at room temperature. If the resistance is incorrect, the oven temperature sensor is bad and needs to be replaced. If not, check all the wires from the oven temperature sensor to the ERC. If it is not the sensor and wires, you have to replace the ERC.
To get the right replacement part just click on the link AppliancePartsPros, then type the model number of your oven in the search box, click on the “search” button and in the new window type the word â€sensor†or the word “clock†in the “search by keyword†box and click the “search” button.  Â
The error code “F4†will be displayed along with a beeping sound if the ERC (Electronic Range Control) or “clock†determines an open oven temperature sensor circuit during the “cook†(bake or broil) mode. The “F4†message will not be displayed in the time of day mode. The cause of the problem is a bad oven temperature sensor or its wire harness. The access to the oven temperature sensor plug and the wires is from the back only. You have to pull the oven out of the wall (if it’s free standing) or remove it from the cabinet (if it’s built in). Disconnect the power and remove the rear cover. Check the resistance across the oven temperature sensor. It is supposed to be about 1100 Ohms at room temperature. If the resistance is incorrect, the oven temperature sensor is bad and needs to be replaced. If not, check all the wires from the oven temperature sensor to the ERC. If it is not the sensor and wires, you have to replace the ERC.
To get the right replacement part just click on the link AppliancePartsPros, then type the model number of your oven in the search box, click on the “search†button and in the new window type the word â€sensor†or the word “clock†in the “search by keyword†box and click the “search†button.  Â
Most likely the problem is a clogged up vent outside the dryer. Before you take any action, disconnect the vent hose from the back of the dryer and run a regular load with the hose disconnected. If the clothes are dry at the end of the cycle, no doubt the problem is a clogged up vent. If you leave it untreated, your utility bill will go much higher, you have to run the dryer 2 or 3 times for the same load, subjecting your clothes to unneeded wear and tear and the most dangerous, overheating of the dryer can lead to a dryer fire (clothes dryers are one of the most leading causes of home fires). To prevent all of these problems the dryer vent has to be cleaned. You have two options: 1)call a company that deals with air ducts and vent cleaning. It will cost you between $90.00 to $120.00 or 2)buy a LintEater kit, part number, DVC202
10 piece rotary dryer vent cleaning system which attaches to a drill and will clean a dryer vent up to 15′ from one end, for less than $30.00 and it will help you many times in the future.
is mounted to the rear panel on the right hand side. Remove wires from solenoids (one solenoid at a time) and check it for continuity. If there is no continuity, then the water inlet valve has to be replaced. Very often screens inside the water inlet valve got clogged with water deposits. In that case the water inlet valve has to be replaced too. The part number for the common, two port water inlet valve used on most Whirlpool and Kenmore direct drive washers is 285805
The most common and the most dangerous cause of the flooding in the laundry room is a broken water fill hose for the washer. How to prevent it? First you have to inspect water fill hoses at least every three months. If they are rusted or you found bubbles on the hoses, they have to be replaced right away. Even if you did not find anything suspicious it is recommended by all manufacturers to replace them every five years. There is a difference in length of the hoses (4, 5 or 6 feet) and the materials they are made of. It could be reinforced rubber, part numbers: 4 feet 254, 5 feet 255 and 6 feet 256
or stainless still.
Part numbers: 4 feet BCS112-48WA, 5 feet BCS112-60WA and 6 feet BCS112-72WA.
All braided stainless still hoses are much more reliable and their life time is at least three times longer then the rubbers.
If your Whirlpool or Kenmore direct drive washer does not spin or agitate but does drain, most likely the problem is a worn out motor drive coupling.
Unplug the washer or disconnect power. To replace the motor drive coupling you have to remove the cabinet (read post “How to remove the cabinet on Whirlpool or Kenmore direct drive washer“) and the water pump (read post “How to replace the water pump on Whirlpool or Kenmore direct drive washer“). Now you have to remove the drive motor. Disconnect both motor harness plugs (on some models only one might be used). If your drive motor has a capacitor mounted on it, remove the wires from the capacitor, carefully labeling each wire. Using a nut driver (1/4″ or 5/16”), remove two screws which hold the top and the bottom retainers to the front of the drive motor. Using a flat screwdriver unsnap the bottom retainer from the drive motor. Using one hand to support the drive motor from the bottom, unsnap the top retainer from the drive motor. Turn the top retainer 90°and pull it out of the slot in the motor mounting plate. Pull the drive motor straight out. The two plastic motor couplings (one on the drive motor shaft and one on the gearcase) are pressed on at the factory. They both will have to be removed by prying or breaking them off. Push one of the new plastic motor couplings on the shaft of the drive motor and the other one on the shaft of the gearcase. Place the four rubber gromets on the studs on the back of the drive motor with the large end facing the motor. Place the new rubber isolation coupling on the motor coupling. Line up the holes on the isolation coupling with the studs on the other coupling on the gearcase. Replace the drive motor, the water pump and the cabinet. You are back in business. The part number for the Whirlpool motor drive coupling is 285753.
The most common cause of water leaks on the Whirlpool or Kenmore (with 110 prefix in the model number) direct drive washer is the water pump. After you remove the cabinet (read the post “How to remove the cabinet on Whirlpool or Kenmore direct drive washer”) at the bottom of the washer, in front (in the right rear corner on 1983 models and older) you’ll see the water pump
which is attached to the motor with two retainers. Using a flat screwdriver, unsnap the top retainer and the bottom retainer from the pump. Turn the top retainer 90°and pull it out of the slot in the drive motor. Grabbing the pump with both hands, pull it out of the drive motor shaft. Be careful when removing hoses as they may have water in them. Using pliers, slide the clamps on the hoses off the ports of the pump. Carefully remove the hoses. Hold the new pump with two ports facing your left and the four legs facing the washer. Push the top hose (large) on the top port and the bottom hose on the bottom port on the pump. Line up the flats on the pump bearing with the flats on the drive motor shaft (you can turn the drive motor shaft if needed). Push the pump on until the four legs are pressed up against the drive motor. Install the top retainer in the drive motor slot and turn it at 90°. Snap both retainers over the pump. Using pliers, slide the clamps on the hoses over the ports of the pump. The part number for the Whirlpool water pump 3363394 Assemble the cabinet back and you are ready to go.
In order to get access to any part on your Whirlpool or Kenmore (with 110 prefix in the model number) direct drive washer (direct drive means “no belts”) the first thing you have to do is remove the cabinet. In this article, I’ll explain how to do that. 1. UNPLUG THE WASHER 2. Using a Phillips screwdriver, remove the screw from each side of the console.                                                                                                 NOTE: On some latest models there are no screws (big saving for Whirlpool). Instead there is a console clip on each side of the console which should be carefully released by inserting a putty knife under the console from the front on each side. 3. Pull the console forward and up to remove the tabs on the bottom of the end caps, out of the holes in the top. 4. Lift the console up and lay it on its back. 5. Unplug the harness connector for the lid switch. 6. Insert a flat screwdriver into the front edge of the clip (located on both sides), and pry back. Remove both clips from the holes in the cabinet and slide down the other end of the clips and out the slot in the rear panel. 7. Open and hold the lid while grabbing the cabinet front opening. Be sure when tilting the cabinet that the back edge clears the vacuum break. 8. Tilt the top of the cabinet toward you by pulling on the lid and opening of the cabinet. This releases the back slots of the cabinet from the tabs in the back of the base 9. Carefully pull the cabinet away from the base of the washer and set it aside.
We will talk about most popular dryers, made by Whirlpool (it also could be sold under “Kenmore†name with the 110 prefix in model number). Assuming the gas is connected to your dryer and the gas shut off valve is open (do not laugh, I’ve seen it many times), it consists of only four parts which can make your dryer stay cold. These parts are: igniter, radiant flame sensor, thermal fuse and set of coils for the gas valve. Also, because you are going to take your dryer apart, it is a good time to clean it from lint built up inside. Such cleaning has to be done at least every other year. You would not believe how many dryers I’ve seen catch on fire.
All these dryers could be divided it two major groups (difference is location of the parts we are talking about).Group A: the lint screen is located at the right rear corner on the top panel.Group B: the lint screen is located inside the door frame. Tools needed: 1/4†and 5/16†nut driver or socket wrench, putty knife, Philips #1 screwdriver, continuity meter
ALWAYS UNPLUG THE POWER CORD before attempt any repairs!
Let’s start with group A: Step 1. How to find, test and/or replace the thermal fuse:
a). Pull out the dryer and squeeze behind.
b). Disconnect the vent hose from the dryer, unscrew and remove the back panel.
c). Locate the fuse on the blower housing.
d). Remove the wires from the thermal fuse and check for continuity across the terminals. Replace the fuse if there is no continuity. The part number for the most common Whirlpool fuse is 3392519.
According to the manufacturer instructions if the thermal fuse is open, you have to replace the operational thermostat together with the thermal fuse. The operational (or the cycling) thermostat is located next to the thermal fuse and it is not an universal part. It has to be ordered by the model number. To get the right replacement part just click on the link AppliancePartsPros, then type the model number of your dryer (it is located on the door frame) in the search box, click on the “search†button and in the new window type the word â€thermostatâ€Â in the “search by keyword†box and click the “search†button.
e). If there is continuity, then go to Step 2. Step 2. How to find, test and/or replace the igniter, the radiant flame sensor and/or the coils for the gas valve:
a). Remove the lint screen and the two screws next to it.
b). If there is a kick panel on the bottom, remove it using a putty knife.
c). Using a putty knife, unlatch the top panel from the front on both sides and lift it up.
d). Unplug the wires for the door switch and remove the two door springs. Then unscrew the four screws (two screws if it is no a kick panel) and remove the front panel.
e). Remove the belt from the idler pulley (which is located under the drum) and pull out the drum together with the belt.
On the left side you will see the burner assembly, which includes all the parts we are talking about. Unplug the wires to the igniter and check for continuity. Replace the igniter if there is no continuity. The part number for the Whirlpool igniter is 279311.
You can also use the igniter made by Maytag. The Maytag part number is 304970. They are absolutely the same, but Maytag sells them for a lot less.
The radiant flame sensor is located on the left side of the burner tube. Remove the two wires from the sensor and check for continuity across the terminals. Replace the radiant flame sensor if there is no continuity. The part number for the Whirlpool radiant flame sensor is 338906.
If your dryer does not heat intermittently forget all the parts we were talking before. The problem is bad gas valve coils located on the top of the gas valve . Unscrew the two screws holding the coil bracket and replace the coils. The part number for the Whirlpool gas valve coils is 279834.
Look for Group B in the next post.
Besides my blog, I’m also trying to help people solve problems with their appliances on some repair forums.
This question was posted earlier today:
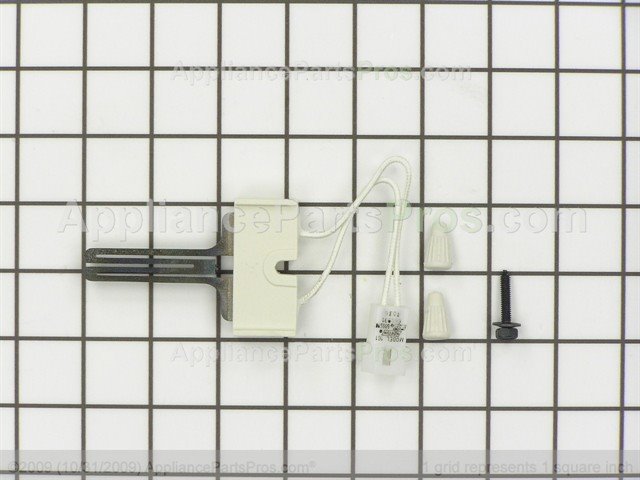
“Hi, hope you can help me with this one. The oven is suddenly not heating. It’s dead. All other functions seem fine. I press ‘bake’ then ‘start’ and the normal couple of clicks happen, but the ignitor doesn’t heat, thus, no gas. No gas, no Christmas cookies. The broiler is fine. There is no error message displayed. I unplugged/replugged it several times hoping that would do something; no luck. Where do I start?? Thanks for any advise. If you fix the problem I’ll send you some cookies!”Â
          Â
In such situation most likely, the bake igniter is shorted out and it has to be replaced. The part number for the igniter is WB2X9154. Â
Â
(By the way, this igniter is universal, it replaces most round style oven igniters).If you are handy and have the right tools (Philips #1 and straight 1/4″ screwdrivers, 1/4″ and 5/16″ nut drivers or socket wrenches, wire cutter and wire stripper) you probably can do it yourself. DO NOT forget to unplug the range first. Â
A few hours later I’ve received a comment: “You were right!!! I was able to get the part this morning and just finished installing it. Not too difficult, only took about an hour and cost less than $65. The oven is cured. Thank you so much! Where shall I send the cookies?”
One of the most common complaints I get with any dishwasher is that it does not clean dishes like it did before or…it does not clean it at all! WHY?
There are two of the most important and most common things affecting a dishwashers performance (if it is not broken mechanically): water hardness and right detergent.
One of the most important parts of a detergent you are going to use is the amount of phosphorus. Phosphorus softens water and helps prevent water spots on dishes. It is always written somewhere on a box or a bottle of the detergent. Find out your water’s hardness by asking your local water department. If it is 8+ grains per gallon, you have very hard water and you have to use a detergent with at least 8.7% of phosphorus content. With 5 to 7 grains per gallon you can use a detergent with phosphorus content about 4% to 6%, and if it is 0 to 4 grains per gallon you have to use detergent with less than 2% of phosphorus. If you or a previous owner used detergent with the wrong amount of phosphorus, especially, if you see white film on the glasses and/or white staff inside your dishwasher (when it is dry inside) – you have calcium build up in your dishwasher. Do not panic. It does not mean you have to buy a new one. There are a lot of different dishwashers cleaning solutions out on the market. You can use Citric Acid, CLR, regular white vinegar and many others. I have learned from my experience, the best and most effiecient is the Dishwasher Magic.